

This simple DIY rose trellis with lattice has been in our backyard for years, supporting two of my favorite climbing roses. The original version was incredibly easy to put together with an 8-foot piece of wood lattice, three wooden stakes, screws, and paint.
When I first shared this project, my climbing roses were only about a year old, so the trellis didn’t need a lot of support. Over the years, those roses became HUGE, and we eventually updated the original design with a stronger frame and additional lattice.
I wanted to update this tutorial to show you not only how we originally made our DIY rose trellis, but also what we changed after seeing how it performed with mature climbing roses.
If you’re starting with young climbing roses like we were, the original version is an easy place to start. If your roses are already large or you want to build something more substantial from the beginning, keep reading for our updated version.
DIY Rose Trellis at a Glance
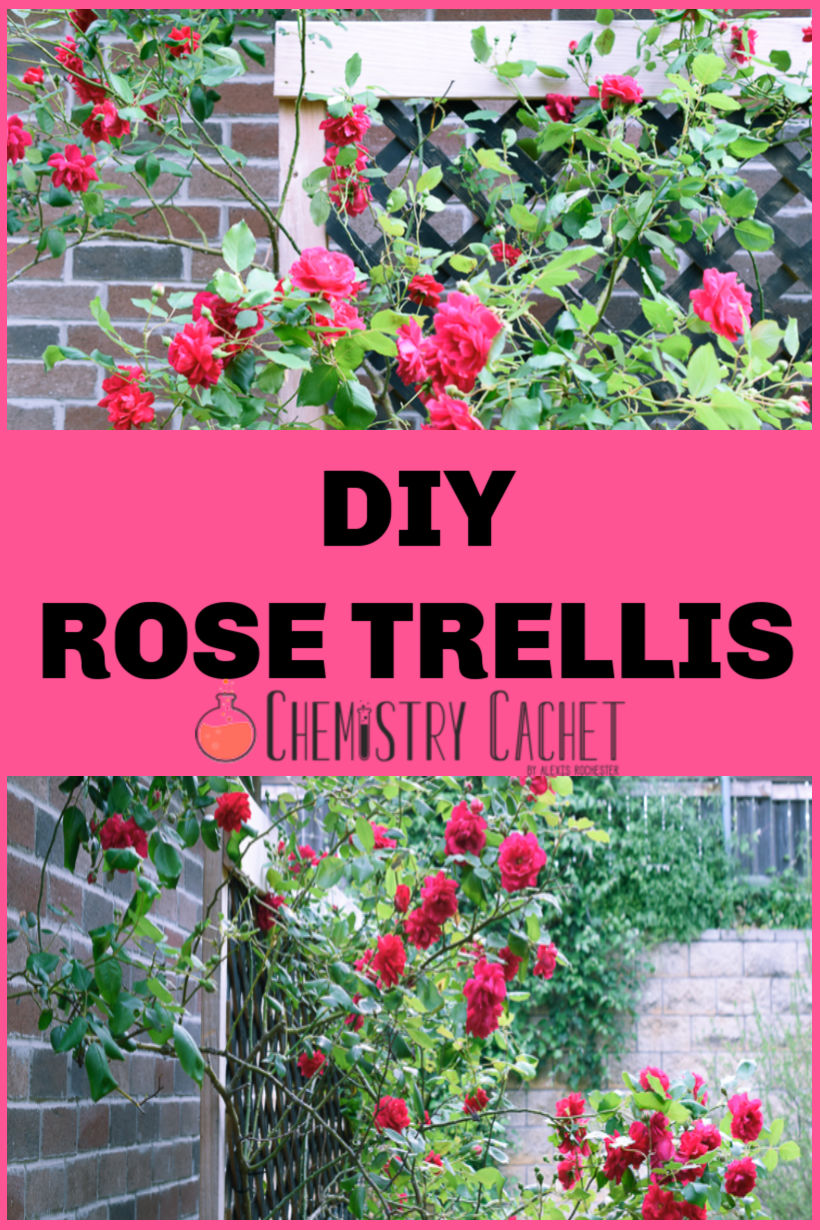
Our original trellis consisted of:
- One 8-foot piece of wood lattice
- Three wooden stakes
- Wood screws
- Exterior paint
- A support on each end and one in the center
We attached the stakes to the lattice, painted everything black, and secured the trellis in the ground behind our climbing roses.
As the roses matured, we added more lattice, built a wood frame around it, and used much deeper supports.
Why I Made My Own Rose Trellis
When we bought our home over five years ago, one of the first things I wanted to do was plant roses.
I’m an old soul in many ways, and gardening has always been one of my favorite things. My love for flowers started when I was young and would help my dad with yard work on warm summer mornings. I was particularly obsessed with the pink mimosa blossoms on the trees. Even now, seeing a mimosa tree takes me right back to those summer days.
I also took horticulture in college, where I learned many of the gardening techniques I still use today.
Roses have become one of my favorite plants in our landscape.
I have two climbing rose bushes in our backyard that are fairly close together. Instead of using two small store-bought trellises, I wanted something that could eventually connect the roses and help create a wall of flowers as they grew.
I couldn’t find the look I wanted at the garden stores, so we made our own lattice rose trellis.
What You Need to Make a DIY Rose Trellis With Lattice
For our original trellis, we used:
- 1 long piece of regular wood lattice – 8 feet long
- 3 wooden stakes with pointed tips – at least 36 inches tall
- Wood screws
- Exterior paint in your preferred color
- Drill
- Hammer or mallet
Our lattice cost about $14 at Lowe’s when we originally completed this project, although prices will vary depending on when and where you buy your materials.
I used flat black paint because I wanted the trellis to visually disappear behind the roses once they filled in.
Important: Our 36-inch stakes worked for the original trellis while the roses were young, but they were not our permanent solution. Once the climbing roses became much larger and heavier, we upgraded to a stronger framed structure with deeper supports. I’ve included that update below.


How to Build a DIY Rose Trellis With Lattice
Step 1: Lay Out Your Lattice and Stakes
Place the lattice on a flat work surface.
Position one wooden stake near each end of the lattice and a third stake in the middle. The middle support helps stabilize the long span of lattice.
The stakes don’t have to extend all the way to the top of the lattice. Ours extended high enough to provide support while leaving enough of each pointed end below the lattice to go into the ground.
Step 2: Screw the Stakes to the Lattice
Using a drill and wood screws, attach each stake securely to the lattice.
We used three supports total:
- One on the left end
- One in the center
- One on the right end
Before installing it, make sure the lattice feels secure and that none of the supports are loose.
Step 3: Paint the Trellis
We painted our trellis flat black.
Black works especially well for this project because once the roses begin filling in, the dark lattice tends to fade into the background and lets the flowers become the focal point.
If your trellis will remain outdoors, choose products appropriate for exterior wood and follow the manufacturer’s directions for preparation, application, and drying time.
Step 4: Position the Trellis Behind the Roses
Once everything is dry, move the trellis into position behind your climbing roses.
We placed ours so the two roses could eventually grow toward each other across the lattice.
Before driving stakes or digging into your yard, make sure you know the location of underground utilities, irrigation lines, or anything else that could be damaged.
Step 5: Secure the Trellis in the Ground
We originally hammered the pointed stakes several inches into the ground until the lattice felt sturdy.
How much support you need will depend on your soil, location, weather, trellis size, and the eventual weight of your roses.
This is one area where our project changed considerably over time. Our small climbing roses didn’t put much weight on the original trellis, but mature roses are another story!
If you’re building for large, established climbing roses, I recommend reading our updated version below before deciding how you want to support your structure.

How I Train My Climbing Roses on the Trellis
Once the trellis is installed, you can begin guiding the rose canes along it rather than simply allowing them to grow straight up.
I gently secure our roses to the trellis as they grow. I originally used zip ties and trained the canes at approximately a 45-degree angle.
When securing rose canes, don’t fasten them so tightly that the tie cuts into the cane as it grows. The goal is to support and guide the plant while leaving room for growth.
Training the long canes outward or at an angle can also help you spread the rose across the lattice instead of having all of the growth concentrated vertically.
When we originally built this trellis, our roses were a little over a year old and had beautiful bright red blooms. At that stage, this simple setup gave them the support they needed while allowing us to start creating the wall-of-flowers look I wanted.
And, as always, my little helper was there to make sure we did everything right!

Our Rose Trellis Several Years Later
This is the part of the project I think is especially important to share.
The original trellis worked when our climbing roses were young.
But roses grow!
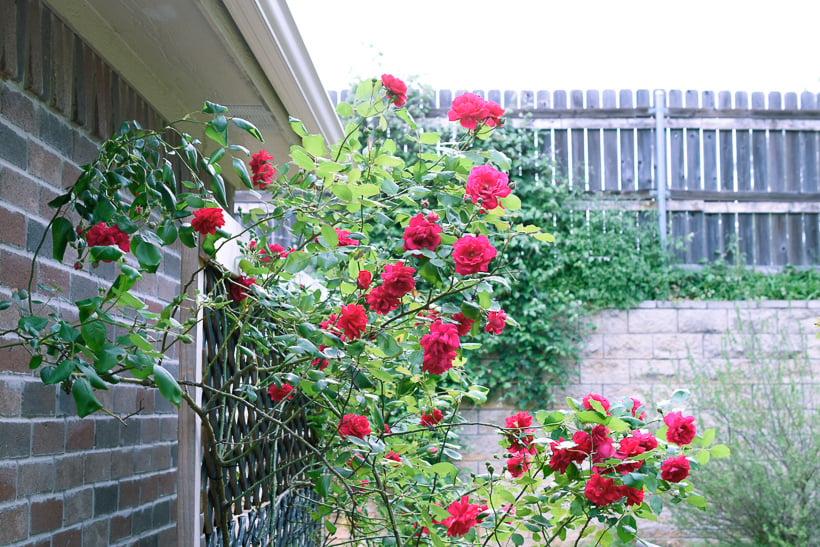
Over the years, ours became much larger than they were in the original photos. As the plants gained height and produced more canes, we needed a larger and stronger support system.
Instead of removing everything and starting over, we expanded the existing trellis.
How We Updated Our DIY Rose Trellis
For the larger version, we:
- Added another set of lattice pieces above the existing lattice
- Built a wood frame around the lattice
- Screwed the lattice securely into the frame
- Extended the wooden supports more than a foot into the ground and stabilized them with rock
Depending on the structure you’re building and your conditions, another option may be setting suitable posts in concrete.
The frame made the entire structure much more substantial and gave our mature roses more room to spread.
We were in a hurry to get ours installed, so we hadn’t painted the new frame black yet when some of these photos were taken. You can paint the entire frame to match the lattice if you prefer a more finished look.
And believe it or not, the roses have grown even more since we added it!
For more information on roses read my post on making your blooms huge, black spot tips, trimming roses and this fall/winter checklist!
Do Roses Need a Trellis?
A reader sent me an email the other day asking me if her roses needed a trellis? I think all climbing roses benefit from a trellis. If you don’t add one, the branches look scraggly, plus they aren’t very secure. If it is windy, the branches can break. So, I think climbing roses definitely need one to look their best!
Mine have grown so large using this DIY rose trellis!


Follow on Facebook | Bloglovin | Twitter | Instagram | Pinterest | Hometalk

Chemistry Hacks For Home and Outdoors
Quick hacks to save time, money, and eliminate unnecessary chemicals!
An easy to use eBook full of over 30+ DIY solutions for cleaning inside and out!
















I am hoping to learn a lot about gardening from you! I wish I could grow roses here where I currently live. No one that I know of can here! Your roses are beautiful! Best, Koko
Thank you! I have pretty good luck growing them here in Texas, but not so much when I lived in California. I will be posting much more stuff on gardening in the future 🙂 Thanks for reading!
Oh my goodness! For weeks now I’ve been debating myself over what to do with my extremely overgrown beautiful climbing rose on way too small wire trellis. Just sent this to my son-in-law who is a super star at helping mt out of super jams like my rose bush.
This has been great for my climbing roses are the years. It has been up for 6+ years, and still good!
I need a way to control a old climbing rose…this looks helpful
This is great for climbing roses!